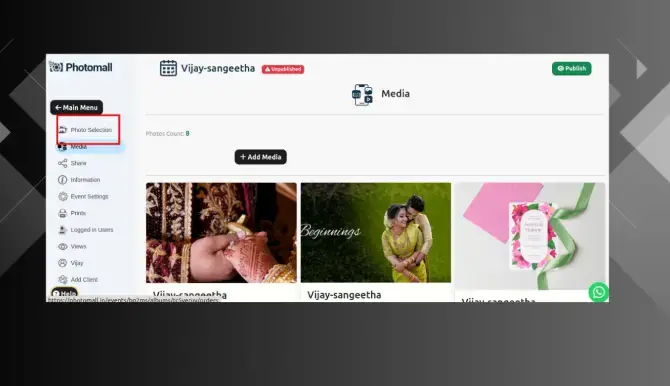
Step 1: Go to the Event page and click on the specific event and click Photo Selection option.
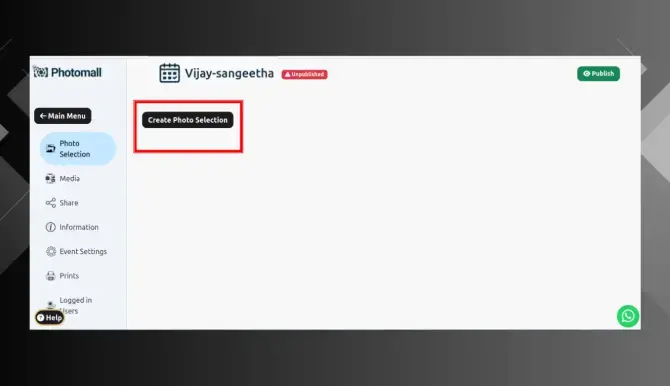
Step 2: Click Create Photo Selection.
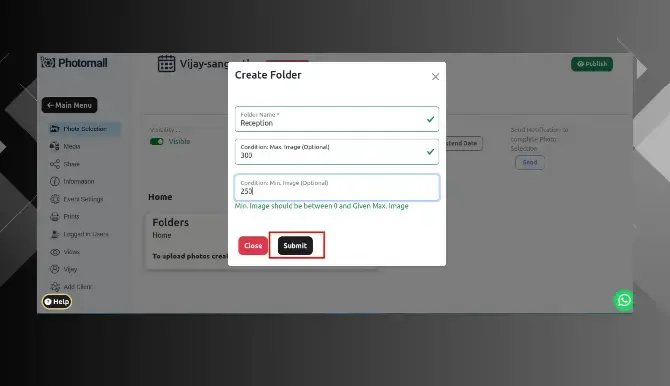
Step 3: Popup will appear , Here enter your folder name , and Max & Min image count (Optional) for Photo Selection. And then click Submit
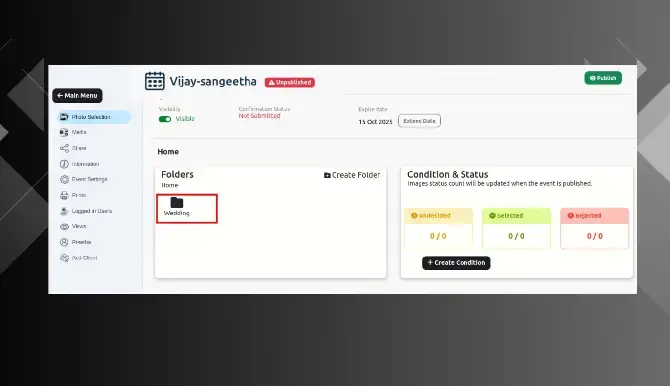
Step 4: Folder will be created successfully, Click the folder.
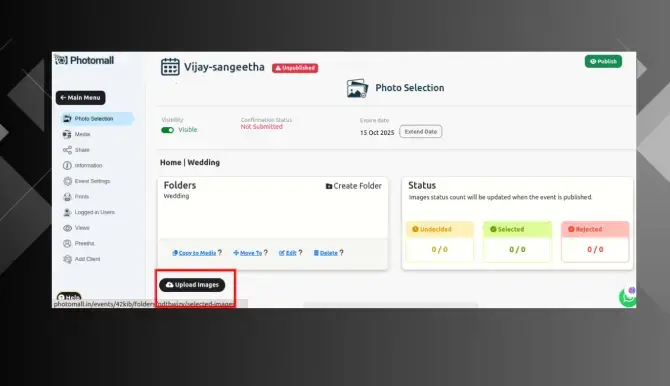
Step 5: click Upload Images Button .
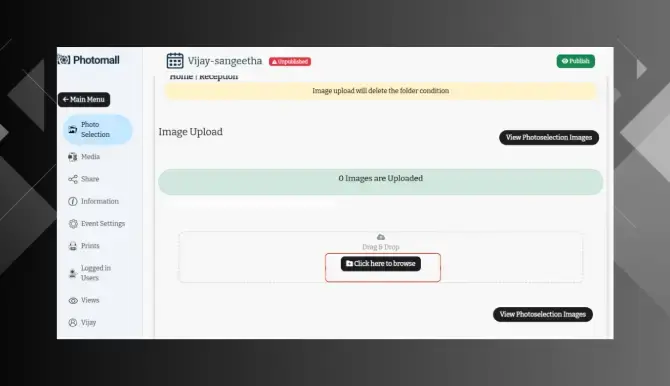
Step 6: Scroll down and click ‘ click here to browse ‘ button.
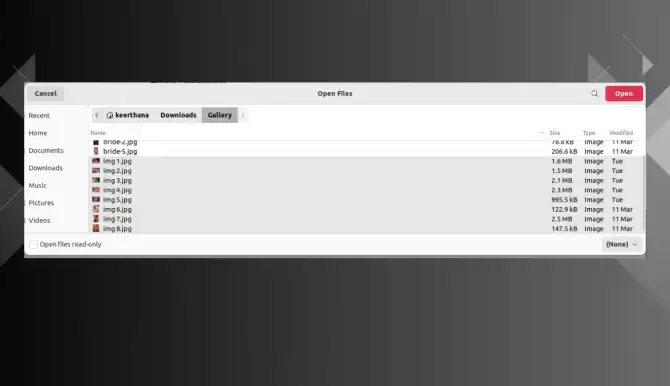
Step 7: Upload the photos from your folder or drag and drop the images.
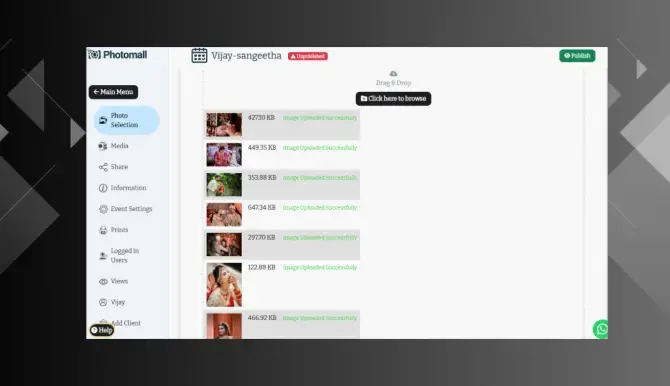
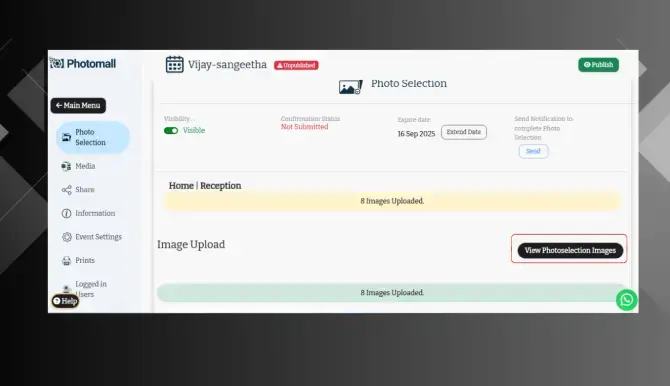
Step 8: The photos for the photo selection process will upload successfully.
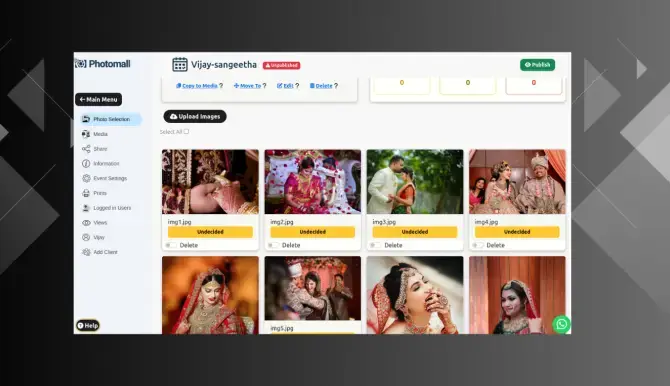
Step 9: And then click View PhotoSelection Images.
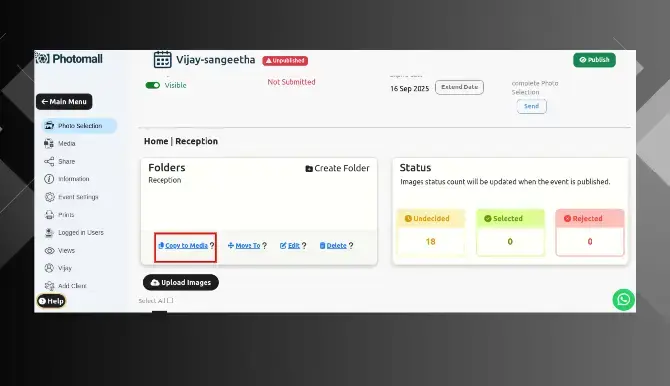
Step 10: Copy to media :If you haven't uploaded the photos to media, you can share them using this option. Note : If this is an AI event, only then you can select ' Copy to Media ‘.
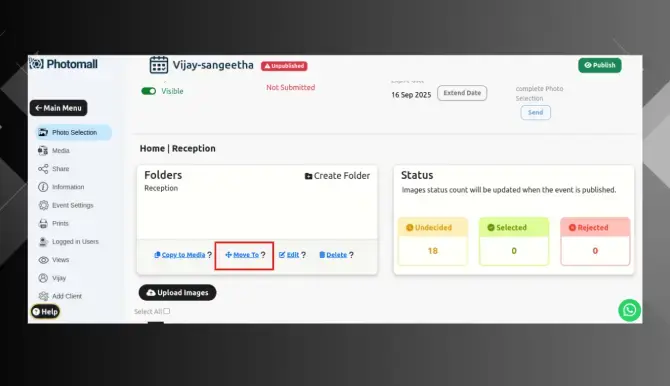
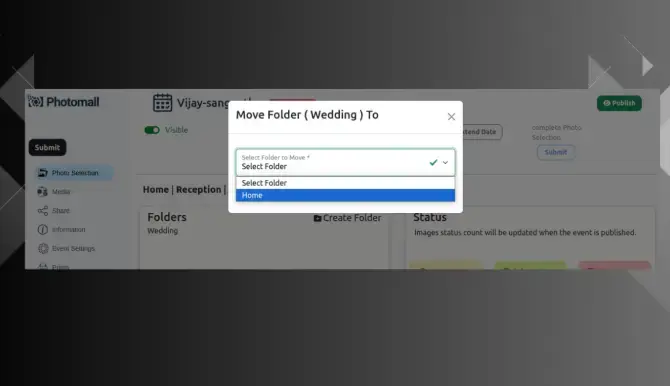
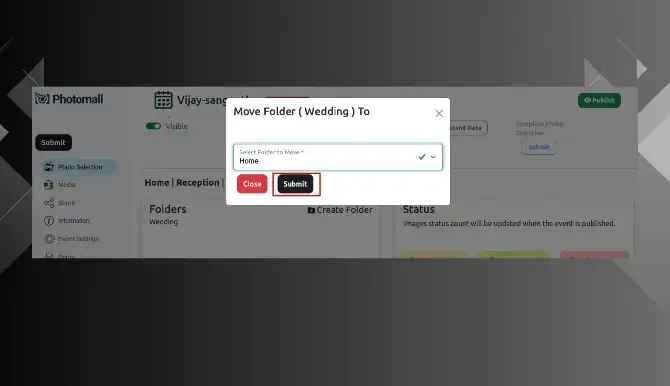
Step 11: Move to : Use this option to move the folder to the homepage.
Step 12: And then click submit button.
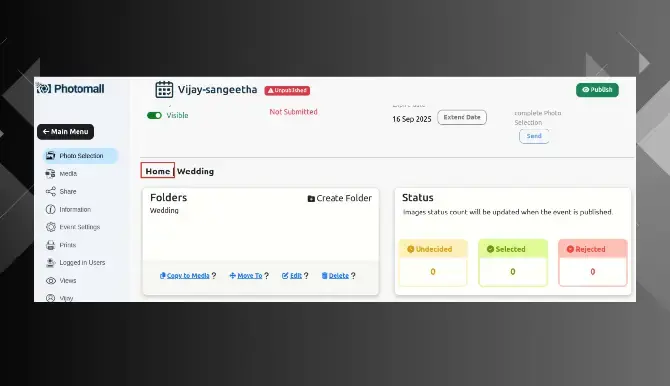
Step 13: Click Home Page.
Step 14: The folder will be moved to the homepage.
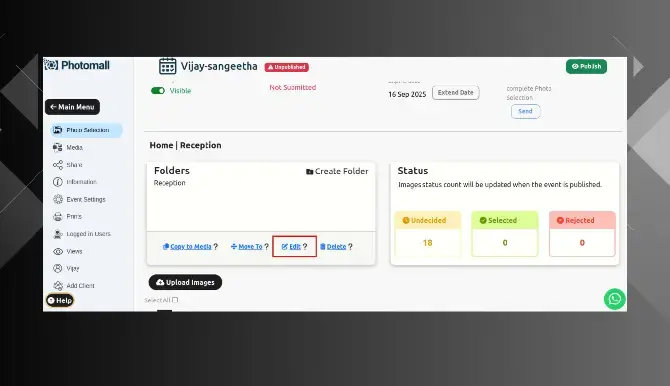
Step 15: If you want to edit your folder name, click the "Edit"option and update it.
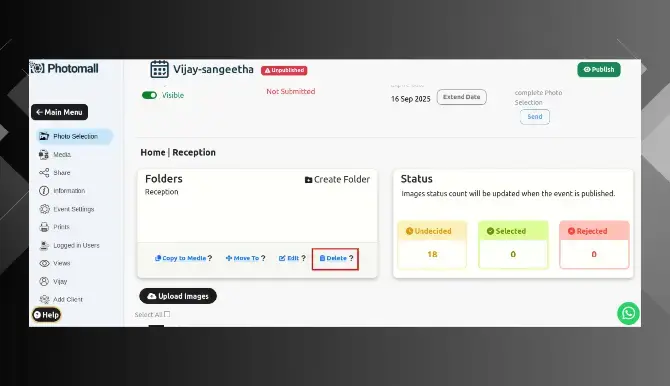
Step 16: If you want to Delete your folder name, click the "Delete" option.
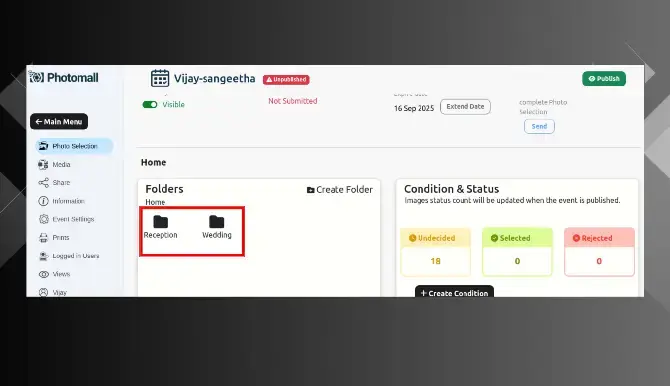
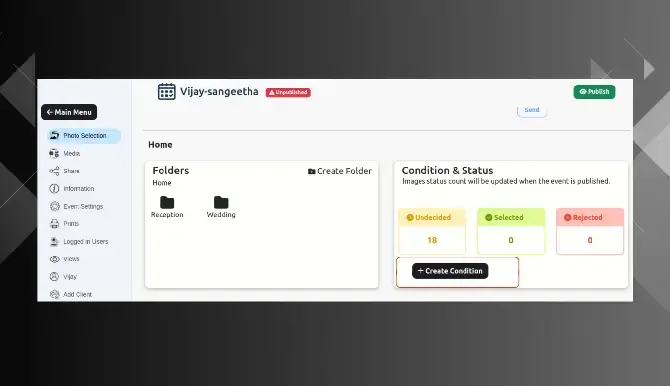
Step 17: Create a condition option – If you didn’t set a condition during the photo selection at the beginning, you can set it here now.
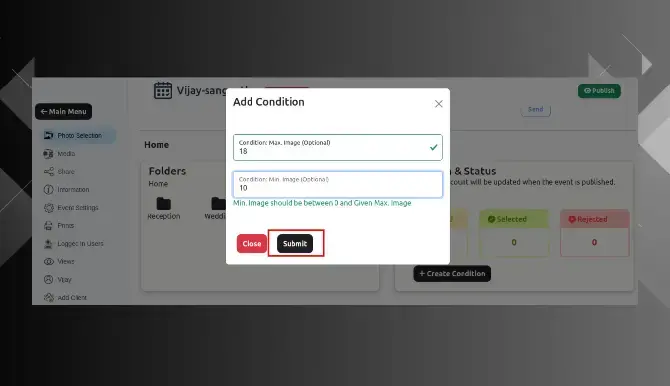
Step 18: Add condition page will appear choose the max and min size and click submit button.
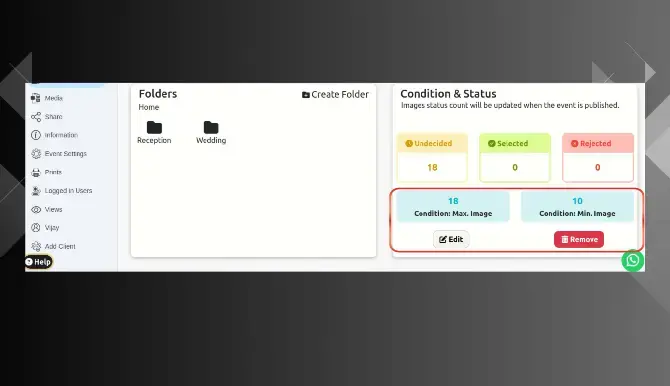
Step 19: Here the condition is appeared .
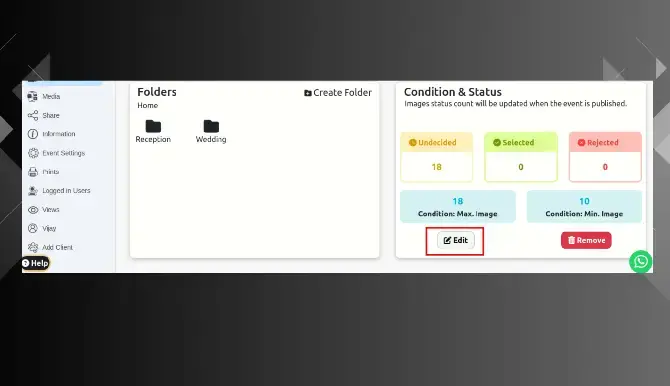
Step 20: Edit – If you want to make any changes, use the "Edit" option to update it
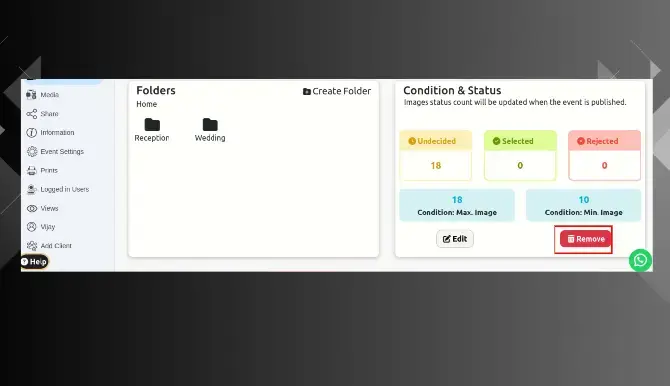
Step 21: Remove – If you want to remove the condition, use the "Remove" option to delete it.
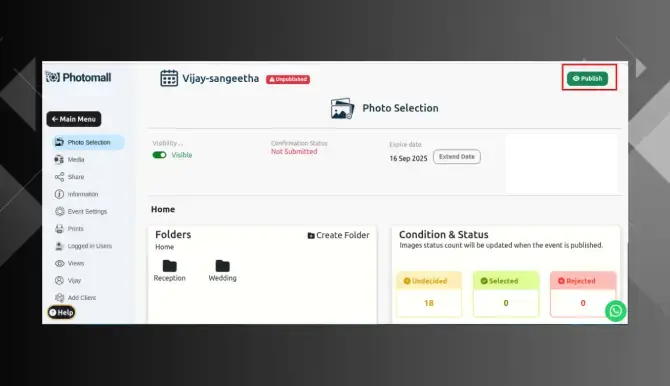
Step 22: And then click "Publish" so your customers can select the photos.
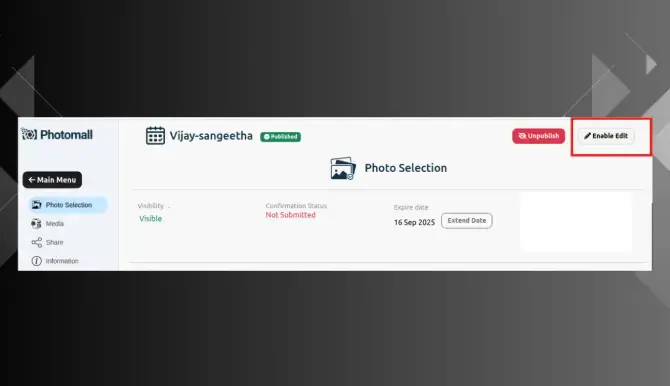
Step 23: Once you click "Publish" it will automatically change to the "Enable Edit" option , If you need to make any changes, you can update them using this option.
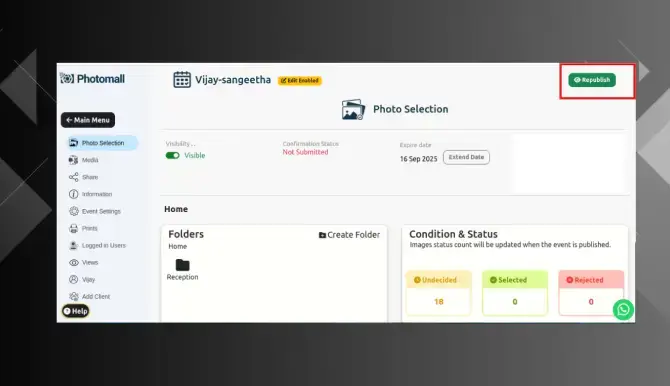
Step 24: Once you click the "Enable Edit" option, it will change to "Republish." Make your edits and then click "Republish" Note - Photo Selection will be visible only for the clients .